Activate MFA for your account
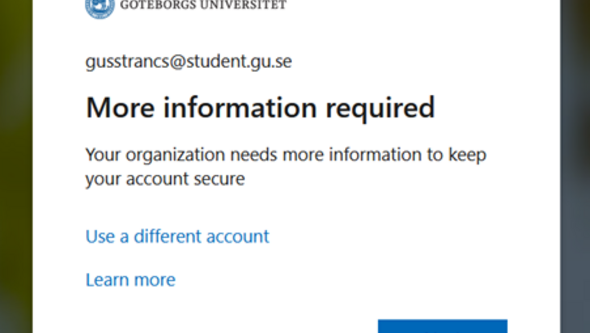
Your Microsoft account should be protected using multi-factor authentication, MFA. This means that you need to activate MFA to be able to log in to your student email and other tools within Microsoft 365. You also need MFA to access the University Library's digital collections outside of campus.
Issues with MFA
If you have already activated MFA and are still experiencing login issues, you can try removing the connection and then re-adding it via Manage multi-factor authentication on your Microsoft account. More troubleshooting tips can be found further down on this page.
What is MFA?
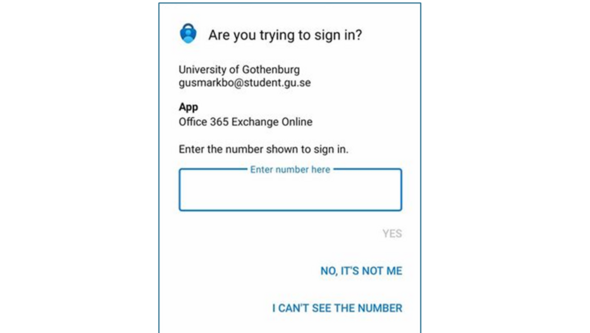
Multi-factor authentication means that logging in takes place in several steps to ensure that the right person is logging in. MFA reduces the risk of your student account being hacked, which can lead to viruses and encrypted information.
Get started with MFA
Activating MFA for your Microsoft account takes 5-10 minutes. You will need a computer and your mobile phone, and can carry out the activation regardless of whether you are connected to the university network or are located elsewhere.
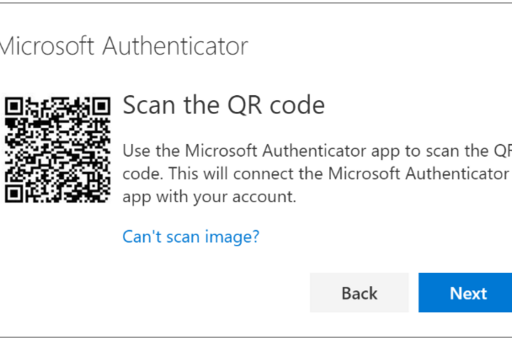
Keep the app on your phone!
It is important to keep the Microsoft Authenticator app on your phone. Your secure login will last up to 90 days, but after that you will need the app again to be able to login.
Instructions and guides
Help with common issues
Contact
If you don't find the answer to your question on this page, you can get help through Servicecenter. For more complicated problems, you can get help from IT technicians via Servicecenter.
Servicecenter
- Contact form
- Email: servicecenter@gu.se
- Phone: 031-786 6500
- Information about locations, opening hours, and phone hours are available on Servicecenter's information page.